Walkthrough for Fallout 4 features a comprehensive guide detailing the progression of the game's main story mission. This walkthrough guide aims to provide players with vital information and highlight the rewards, points of interest, loot, and important interactions throughout the game and presents a linear pathway for players to navigate through the story with ease. For a complete list of all available quests in Fallout 4, please check our Quests page.
- For guides and tips you should know before playing Fallout 4 please visit our New Player Help page.
- See our NPCs page to view a list of all NPCs you can interact with. Your interactions with them may affect your relationships and the Quests you unlock.
- See our Companions page to view a list of all potential allies you can recruit throughout the game.
- For an in-depth guide on the available companions that are romanceable in Fallout 4, please visit our Romance page.
Fallout 4 Full Walkthrough Guide
List of All Main Quests in Fallout 4
Fallout 4 Act 1 Quests
Fallout 4 Act 2 Quests
Fallout 4 Act 3 Quests
Fallout 4 Act 1 Main Quests Walkthrough
Click to be redirected to the specific page of the quest.
War Never Changes

- Create your character.
- Speak to the Vault-Tec rep.
- Choose S.P.E.C.I.A.L. stats and Name.
- Watch the news.
- Get to Vault 111.
- Ride the platform.
- Take the Jumpsuit.
- Follow the scientist.
- Comfort Shaun.
- Get in the pod
After the opening cutscene, you will be guided through the character creation process for Fallout 4. This starts with you customizing your face in the mirror. Select your gender, sculpt your face, and enjoy the playful banter between your character the wife (or husband, if you're playing as a female). Once you've settled on a look, exit the scene and begin to explore the house. Codsworth will be hovering around in the kitchen, interact with him to choose your breakfast.
Once you've interacted with items in the kitchen, you can speak to your wife/husband again and you'll get some more playful dialogue. Once you've exhausted this, there will be a knock at the door. Answer the door and talk to the Vault-Tec Salesman. This is where you get to set your name and choose your S.P.E.C.I.A.L. attributes. After you complete this, Codsworth will beckon you to comfort the baby. Interact with the baby and when prompted, play with the mobile above the crib. Codsworth will then beckon you and your partner to the family room. The news is reporting that the bombs are dropping.
When instructed, run out of the house and follow the mass of people. You'll go right out of your house, then right again into the woods, across a small bridge and you'll find yourself atop the Vault 111 entrance. As the bombs go off, the lift will descend. As you enter the vault, follow the instructions the NPCs will give you. You'll be told to file into the vault, and then put on a Vault 111 Jumpsuit. You'll then be led to a chamber where you will undergo "repressurisation" and "cleansing'. Interact with the pod and watch the following cutscenes to conclude the quest.
Out of Time

- Exit Vault 111
- Go home
- Talk to Codsworth
- Search the neighborhood with Codsworth
- Kill the insects
- Investigate Concord via The Red Rocket Truck Stop
Following a cutscene, you come to in the cryo pod in Vault 111. When you regain control, open the pod your wife/husband was in by interacting with the terminal then interacting with the pod itself. You'll take their wedding ring before declaring that you'll find Shaun. While the waypoint directs you to the quickest way to leave Vault 111, you'll need to investigate the vault further to go through the game's combat tutorial. Throughout the vault you'll find several clusters of Radroaches, the first time you'll be unarmed and you'll learn about melee combat, the second time you will have found a gun and the third time you are shown VATS. None of the groups are particularly difficult. Explore all desks and cupboards as there is a wealth of loot available in the area. Mostly you will find .9mm ammo, Stimpaks and RadAway.
The path through the vault will eventually lead you to the Overseer's office. Read his instructions and logs to find out about the true purpose for the denizens of Vault 111 and what went wrong which resulted in all the skeletons that you're finding. There will be an option to open the escape corridor, make sure you activate that as it will allow you to leave the vault. Following the path from the Overseer's office and past the VATS tutorial you'll find yourself at the vault entrance. Go to the platform at the right of the room (as you come in) and there will be a skeleton which has a Pip-Boy around its wrist. Take the Pip-Boy, then interact with the control panel to activate the entrance and allow you to escape.
Upon exiting the Vault, head east to discover Sanctuary. You will meet Codsworth outside of your old home who will advise you on just how long you've been in suspended animation. Talking with him will also reveal tips about the world, the kind of enemies you can expect to meet in the area and he'll offer to help you search for Shaun. Accept his offer and follow him as he searches house to house. In the last house you'll find a group of Blowflies which you can choose to engage, or just hang back and let Codsworth deal with. Codsworth will conclude that Shaun and Nora are really gone and that you should search for them. He'll recommend you investigate Concord and offer you directions.
Follow the waypoint marker towards Concord and you'll happen upon Red Rocket Truck Stop, where you'll meet Dogmeat for the first time. Greet him and he'll come with you. Several Mole Rats will ambush you, but between you and Dogmeat they shouldn't prove to be too much of an issue. If you want to investigate the truck stop, you'll find all of the various crafting tables needed for the game and you can read through tutorials of them all. There are supplies within the Truck stop so make sure you search every nook and cranny.
Once you're done with the Truck stop, follow the waypoint marker into Concord. You'll happen upon a pitched battle between Raiders and Preston Garvey outside of the Museum Of Freedom. Be careful not to let the Raiders flank you as you'll still be quite vulnerable at this point. Try to kill them quickly with headshots in VATS. Once the fight is done, Preston will instruct you to pick up the Laser Musket, which then triggers the When Freedom Calls quest.
Jewel of the Commonwealth
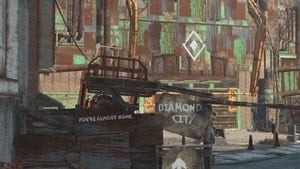
- Go to Diamond City
- Find information about Shaun
- Go to Valentine's Detective Agency
Head Southeast from Sanctuary to get to Diamond City. It is a long journey to the city, so take the time to do some exploring of the wasteland for Items if you'd like. A suggested path would be to head through the middle of the map, past Back Street Apparel and carry on directly south. This should allow you to bypass some more of the difficult enemies in the area. After crossing the bridge, you will see signs directing you towards Diamond City.
At the entrance of the city, you meet Piper, a reporter. She tells you how to trick the guard into letting you inside.
At the entrance to the city, speak with Mayor McDonough and he will tell you what he thinks about Piper. You can then head into the Diamond City Market.
Speaking with several of the NPCs in the market will help you advance in your quest. The following will give you clues:
- Danny Sullivan
- Pastor Clements
- Nat
- Piper
- Moe Cronin
- John the Barber
- Artuo
- The Proprietor of the Valentine Detective Agency
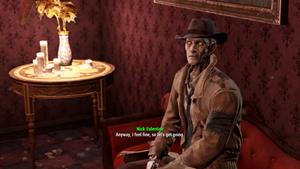
Once you make it to the Valentine Detective Agency, you find that Nick Valentine has gone missing. Speaking with Ellie Perkins, she will ask you to help find him.
Unlikely Valentine

- Find Nick Valentine
- Free Nick Valentine
- Talk to Nick Valentine
- Follow Nick Valentine
When you start the quest, you're told that Nick was last seen near Park Street Station, which is located at the northeast edge of Boston Common close to Goodneighbor. Leave Diamond City and head east by whichever path you choose to take. Be wary though, the area is full of many different kinds of enemies. You can encounter Raiders, Scavengers, dogs and Super Mutants so have your wits about you, keep plenty of ammo on hand and know when to run if you are overwhelmed.
Once inside the station, head down the stairs and you'll encounter 3x Triggermen. Triggermen are a mix of human and non-feral ghouls. They fight with primarily pistols or submachine guns. Fortunately, this area offers lots of cover so take your time and get them down. Explore the area as there are a lot of useful crafting items to be be found.
Once you've cleared the area, head out through the only door and carry on down the stairs to the station platform. Here you'll find 6x Triggermen. This fight becomes a little more hairy as there is a lot more open space for them to spread out and if you're taking hits from multiple submachine guns you won't last long. Bait them to chase you to the stairs and take them out one at a time. Once the group is down, follow the tunnels until you come to the next platform, where another 5 Triggermen will be waiting for you. As before, bait them out to separate them from the group and take them out one at a time. You'll now have reached the door to Vault 114. Interact with the panel to open it and head inside.
In the Vault atrium you'll find three more Triggermen. Once they're down, explore around and read the terminal located here to find out about Vault-Tec's little social experiment for Vault 114. Follow the corridors and head deeper into the Vault. You'll come to a corridor with two Triggermen chatting to each other facing away from you. A grenade or molotov cocktail works particularly well here.
Carrying on, you'll come to an open area with several gantries and 5 Triggermen. As before, bait them out and kill them one by one. Once the area is clear, follow the gantries to the room at the bottom and there'll be a hatch open in the floor. It's a one way trip, so drop down. You'll next come to what looks like a large mess hall/recreation area. Up above you'll see Dino, one of Skinny Malone's guards, taunting Nick Valentine who is locked in the Overseer's office. Kill Dino, then loot his corpse to find the password for the terminal on the wall. Unlock the office and head inside. Talk to Nick and exhaust all the available dialogue. Before you follow him out of the office, make sure to pick up the Speech Bobblehead from the Overseer's desk.
Nick will now lead you out of Vault 114. Deal with the several sets of Triggermen you find however you wish (Nick gives you the option, be quiet or be loud). Following Nick you'll eventually reach the exit where the boss Skinny Malone along with Darla and bodyguards are waiting.. There are several ways to put an end to this conflict, and it is possible to escape without violence or to turn Darla and Skinny Malone against each other.
After the conflict is resolved, Nick will return to his office in Diamond City. Meeting back up with him will let you receive your reward and continue your search for Shaun.
Getting a Clue
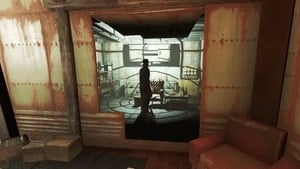
- Go to Valentine's Detective Agency
- Talk to Ellie Perkins
- Sit down
- Tell Nick Valentine your story
- Follow Nick
- Get the key to Kellogg's house
- Investigate Kellogg's house
- Follow Nick
- Show Dogmeat the cigar
Once you have completed Unlikely Valentine, you will be told to meet up with Nick in his office. Fast travel to Diamond City Market and head straight to his office. On Nick's invitation, sit down and go through the dialogue options to build up Nick's suspicions about a local mecenary named Kellogg who has a history of abducting children. Nick will tell you that Kellogg used to have a house in Diamond City and suggests the two of you head up there to investigate.
Follow Nick up to Kellogg's house. When you get there, the door is locked and locked tight. You can pick the lock if you are a master at lock picking, otherwise you'll need to procure the key from the Mayor's office. Head to the otherside of Diamond City market and ride the elevator up to the Mayor's office. As you walk in, Piper will be arguing with the receptionist, Geneva. You can talk to them, but you'll need to just head through the double doors and into the Mayor's office. Talk to Mayor McDonough and ask him about the key. If your charisma is high enough you can charm him into giving you the key. If that doesn't work you'll be stuck as the Mayor cannot be bribed. You can, however, bribe Geneva for 250 caps. The key is in her desk, so you can either bribe her, charm her or steal from the desk (but risk losing Karma as a result).
However you acquire it, once you have the key head back to Kellogg's house and make your way in. The house has little in the way of items, initially, but look under the desk to find a button that opens a secret door. In here you'll find huge amounts of food and ammo as well as a handful of Kellogg's half smoked cigars. Once you've picked them up, talk to Nick and you'll suggest that Dogmeat could track the scent. Head out of the house and Dogmeat will be waiting outside for you. Show him the cigar and the Reunions quest will trigger.
At this point, you can also elect to have Nick be your companion, which is entirely up to you.
Reunions
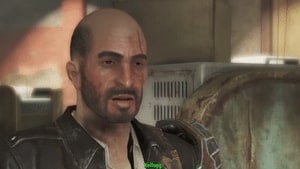
- Follow Dogmeat
- Search for 1-3 clues to Kellogg
- Check on Dogmeat
- Find a way into Fort Hagen
- Search Fort Hagen
- Confront Kellogg
- Kill Kellogg
- Search for more information
- Discuss your findings with Nick
- Discuss your findings with Piper
Be prepared as this quest is a long one. Make sure you're stocked up on plenty of ammo and healing items before you leave Diamond City. This quest is separated into two distinct sections: trailing Kellogg and Fort Hagen.
Once you've showed Dogmeat one of Kellogg's cigars, he'll lead you out of Diamond City, towards the southwest and to a pond on the outskirts of Boston. He'll pad around gesturing you to find some evidence that Kellogg had been there. Look at the ashtray and pick up the cigar, at which point Dogmeat will get the scent back and lead you down to the train tracks. Be careful as you get closer to the tracks as there may be some Deathclaws around (two Deathclaws were idling around in two plays of this quest for me, but it's not confirmed if they're always there). Follow Dogmeat up the tracks, dealing with the enemies that appear (likely to be groups of Mole Rats). Dogmeat will lead you to the highway and a dead body. Examine the body, make sure to pick up the Stimpak on the floor. You're looking for bloody rags near the body which will give Dogmeat the scent again.
Continue following Dogmeat as he leads you down the train tracks again. There are a lot of enemies in this area including Wild Mongrels, a Yao Guai and potentially a group of Raiders, so be on your toes. Dogmeat will lead you into a building, down some stairs to an underpass where you'll need to find another clue. You're looking for a decoy on a sleeping bag but be careful as it's booby trapped with a Mine. Once you've either defused the mine or been blown up, inspect the sleeping bag and Dogmeat will start off once again.
Dogmeat will lead you over a bridge that is strewn with cars. In between the cars are ambushes of Feral Ghouls, including a legendary one who may mutate if you're unlucky. Once they're down, carry on following with Dogmeat. He'll lead you up a hill with a broken Protectron, decapitated trader and a damaged Assaultron. Talk to the Assaultron to find out that Kellogg has indeed been through here. Check the trader's body for some caps and his boxes for some healing items before continuing on with Dogmeat.
You'll now be led into the woods where you'll be prompted to look for clues again. Look for the bloody rags on the broken fence to pick up the scent again for the last push to Kellogg's hideout. Dogmeat will then lead you up to Fort Hagen, which is Kellogg's stronghold. If you have a companion other than Dogmeat, you'll dismiss the dog at this point. There are two ways into Fort Hagen, you can either access via the roof or through the parking garage.
Parking Garage Route
From the front door of Fort Hagen, go to the right of the building and follow the steps down into the parking garage. Head down the ramps until you find a door, which will let you enter into the bottom of the building. When you enter, there will be a door in front of you, but it is chained from the otherside, so head up the stairs. You'll come to a Protectron charging station with a Terminal on the wall. If you want, hack the terminal and use the Protectron as a decoy in the next area.
Be cautious as you will encounter a lot of Synth enemies in this area and it's likely that this is your first time against them. They're not the hardest of enemies, but they can swarm you and overwhelm you easily. They carry either Institute Laser Pistols or Institute Laser Rifles which happen to work really well against the Synths, so make sure to pick one up early. Work through the rooms slowly and make use of cover to minimise the damage you're taking. Be careful as the Synths have pretty good AI and they will try to flank you.
Follow the rooms through, taking it slowly, dealing with the Synths and the ceiling mounted turrets until you reach a lift. Get in the lift, which leads to a trap. When you get out of the lift crouch and get to cover as you come out in a long corridor with a machine gun turret at the end. Use the doors and cover to move up while trying to avoid taking damage. Halfway up the corridor is a room to the left which will let you flank around and deal with the turret away from the corridor itself.
In the room with the turret, head down the stairs and through the security door. Kellogg will start taunting you over a PA system. Follow the steps down and deal with the Synths in the corridor. You'll come to a set of doors which will open you up to Fort Hagen Command Center. The next area is fairly linear, so operate as you have been, taking it slowly and dealing with Synths and Turrets as they appear. Look into side rooms to find plenty of useful items. The area is littered with Stimpaks, Rad-X, Radaway and Med-X.
Eventually you'll reach a wood panelled office, at which point Kellogg will say that he's stood his Synths down and you can safely approach him. Make sure to be prepared for a fight, have your favourite weapons hotkeyed and your healing items ready to use. Go into the next room and confront Kellogg face to face. He'll tell you some vague details about Shaun being in the care of the Institute, but nothing useful beyond that. The boss fight will then ensue.
This fight is hard. Kellogg has high HP and high damage resistance, so try to focus on crippling a body part using VATS to increase damage. First though, keep moving and deal with the 3 synths that are in the command centre. While Kellogg is dangerous, the synths will make short work of you. The key to this fight is to keep moving as Kellogg's pistol does a lot of damage but he also throws two grenades at a time, so you need to keep mobile to avoid being crippled or killed.
Once you've killed Kellogg, loot his body. Make sure to take everything from his body as he has a cybernetic implant for the next quest. You'll get the password for his terminal too, which you will need to use to leave. Open the doors on the terminal then head out of the room and go to the exit on the left. You'll ride an elevator up to the roof, where you'll see the Brotherhood of Steel arrive in a suitably ostentatious fashion.
Talk to Nick if you have him with you, then fast travel to Diamond City Market. Find Piper and talk to her to find out what little she knows about the Institute. Nick will suggest that you visit a doctor in Goodneighbor to find out if any of Kellogg's memories are in the cybernetic implant which may have clues to the location of the Institute. This will trigger the Dangerous Minds quest. At this point Piper becomes available as a companion as you're asked to choose who you want to take with you, Piper or Nick.
Fallout 4 Act 2 Main Quests Walkthrough
Click to be redirected to the specific page of the quest.
In this quest you will use the Cybernetic Brain Augmenter to dig into the memories of Kellogg. If you did not bring it with you, return to Fort Hagen to retrieve it. You can take either Nick or Piper with you on this quest. Nick is a key part of the quest so no matter which companion you have with you, Nick will be waiting at The Memory Den in Goodneighbor.
Fast travel to Park Street Station then head east from there. Be careful as there are a few Super Mutant strongholds in the area as well as several Feral Ghouls, some Raiders and even some dogs. Fortunately, if you don't want to deal with enemies it's not far from the station to Goodneighbor so you can sprint the whole way if needed.
If this is your first time entering Goodneighbor, when you enter you'll be greeted by a Ghoul who will try to extort from you, only for the Mayor to enact some discipline on him...
Head through the alley in front of you and you'll come out right in front of the Memory Den. When you enter, Nick will have a casual flirt with the owner, Irma. She'll gesture you to go downstairs to the basement, where you'll find Doctor Amari. Talk to her and offer the Cybernetic Brain Augmenter, which she determines will work within Nick's brain. When it initially doesn't work, she'll suggest that two minds could crack the Institute encryption and gesture you to sit in one of the memory pods.
The next sequence is a linear progression of Kellogg's memories. In each scene, interact with Kellogg for some back story, then the other characters in each scene to find out more. The memories will each play out and fade, at which point Amari will instruct you to move to the next one. Once you've completed all of the memories, you'll awaken with new instructions, to find Dr Virgil in The Glowing Sea. This will trigger the next quest The Glowing Sea.
Before you leave the basement, make sure to check all of the tables, cupboards and desks. There are loads of items for grabs including Stimpaks, RadAway and Rad-X in large numbers.
If you brought a companion other than Nick with you, when you head upstairs you'll be asked who you want to take with you.
As an observer of Kellogg's memories, you can watch the dream play out, interact with the people or find the continuation to skip the memory. The final memory of a child and an individual from The Institute is the one you're looking for.
Access the television in the final memory to leave the memory sequence. Speak with Doctor Amari to learn about an old scientist from the Institute and leave the Memory Den. You can speak to Nick Valentine here for more insight into him.
In the last quest, you learn from Kellogg's memories and by talking with Doctor Amari that your best chance to get into The Institute is to find the only person to successfully escape; the scientist Virgil. However, he's camped out in The Glowing Sea, a heavily irradiated area in the bottom south-west of the map. Before even daring to start this mission, make sure you have huge amounts of Rad-X and RadAway. You'll also need some pretty strong Rad-resistant gear so the Hazmat Suit or a suit of Power Armor are essential. If you're out in the open without protection you'll be killed pretty quickly by the rads, so be prepared. If you're taking a companion with you, you'll need one who is Rad-resistant. So, essentially, any companion who isn't a human. Or Dogmeat.
Looking at the map, you need to be heading towards the bottom left corner, or directly south west. The safest bet, especially if you're not using Power Armor or you don't have many Fusion Cores is to find the Electrical Hobbyist's Club which is just on the edge of the Glowing Sea. This will provide a quick way to get back into the area if you have to fast travel out for whatever reason. The best bet is to follow the way point marker on your HUD to keep you heading in the right direction.
By following the way point marker and keeping in a relatively South West trajectory you'll happen across a couple of buildings you can enter. One is a sunken Red Rocket station that contains a Master Safe. The next is the Capsized Factory, which has a few goodies in but also happens to contain several Feral Ghouls who can easily overwhelm you. Throughout the journey you'll also happen across Radscorpions, Bloodbugs and Bloatflies.
Keep following the waypoint marker and you'll end up at Crater of Atom, an impact point from the bombs that were dropped 200 years ago. The people here are heavily irradiated and they are generally not that accepting of you. Find and speak to Mother Isolde, the leader of the Atom cult. Lowering your weapon and speaking with her will result in her pointing you to a cave. The cave is southwest from the Crater of Atom, beyond the edge of your map.
When you get close to the cave, a Deathclaw will attack you. Be careful and be mindful of taking too much damage if you're using power armor. Once the Deathclaw is down, head into the cave.
You will encounter Virgil inside the cave. In exchange for his help, he asks you to fetch a serum for him from inside The Institute. While helping him is not integral to the main story, it will initiate a misc quest called Curing Virgil. You can also opt to kill Virgil or steal from him to obtain Virgil's Rifle. After speaking to him, the Hunter/Hunted quest will trigger.
Hunter/Hunted

- Travel to C.I.T. Ruins
- Tune to Courser's radio frequency
- Use the Courser's radio frequency to track Courser
- Kill the Courser
- Recover Courser Chip
After speaking with Virgil in the Glowing Sea, he recommends you infiltrate The Institute which is a tall order. The only way to access The Institute is via teleportation so that's your only option. To hack into their teleportation network you will need the correct access codes. Killing a Courser and decoding the special chip in its brain is the only way to find these codes. Coursers are dangerous synths, used primarily for kidnapping, wet work and retrieving runaway synths. They are not to be taken lightly.
Travel to the C.I.T. Ruins, which will be marked on your map. If you're going to go on foot, it's directly north east of Virgil's cave but it's simpler to fast travel to a nearby location. When you reach the front of the C.I.T. Ruins your Pip Boy will find a courser signal. Open it, head to the Radio tab and select the signal. You'll then hear a sonar blip and you'll regularly get signal strength updates as you move about. The closer you get to the Courser's location, the stronger the ping will be. The ping will lead you to the Greentech Genetics building. As soon as you enter the building you can open your Pip Boy and turn off the signal. The courser is in this building, you don't need to keep tracking him.
The building is full of Gunners who are also on the trail of the Courser. You can speak to them, however more than likely you'll end up fighting them. Work your way up the ruined building, taking your time to deal with any gunners in your way. They can pack a punch and several carry rocket launchers so be careful.
When you reach the top of the building you will meet Courser Z2-47. This encounter can be ended either by giving him his factory reset code, instantly killing him, or fighting normally. This code is obtained by giving Mama Murphy drugs until she has a vision about the character encountering the Courser. After killing him, loot the Courser Chip from his vanquished form. Z2-47 was in this building chasing down the synth girl who has locked herself in a room. She'll plead with you for her life. To let her out, go to the toolbox underneath the stairs and retrieve the door password (or hack the terminal if your hacking skill is high enough), then talk to her.
Once you're finished, take the lift down and exit the building to end the quest.
The Molecular Level
-min.jpg)
- Have the Courser Chip analyzed
- Search the Railroad HQ
- Analyze the Courser Chip
- Return to Virgil
- Get help to build the signal interceptor
- (Optional) Talk to the Brotherhood
- (Optional) Talk to the Minutemen
- (Optional) Talk to the Railroad
- Talk to [faction scientist]
- Build the reflector platform
- Build the beam emitter
- (Optional) Search military sites for a circuit board
- Build the relay dish
- (Optional) Search telecom sites for a sensor module
- Build the console
- (Optional) Search hospitals for a Biometric Scanner
- Power up the signal interceptor
- Talk to [faction scientist]
- Use the signal interceptor
After retrieving the Courser Chip, go see Doctor Amari at the Memory Den in Goodneighbor. She will recommend that you contact The Railroad.
NOTE: If you have not contacted the Railroad at this time, you must complete the quest Road to Freedom. You will not be able to progress this quest until you do so. This quest is also your last opportunity to secure support from the Minutemen and Brotherhood of Steel so if you have not developed your standing with that faction, now is the time to do so. See the Quests page for quests related to the Factions.
When ready, enter the church to gain entry to the The Railroad base. Speak with their leader, Desdemona, and have the Courser Chip analyzed by Tinker Tom. Afterwards, you may leave this location via the escape tunnel so that you can remove the chain to the secret door. Doing so allows you easier access the next time you wish to return to their base of operations.
Return to Virgil's location in the Glowing Sea. After explaining to him the present situation, he will give you Signal Interceptor Plans.
Now that you have the plans in your hands, you can begin the process of building it. There are 4 ways to go about this, each presumes that you are in good standing with the respective faction. Note that each faction will ask you for information on the Institute, so if you plan on working with the Institute in the future keep these requests for espionage in mind.
Option 1: Brotherhood of Steel
Go to the Cambridge Police Station, taking out Feral Ghouls in conjunction with the Brotherhood of Steel quest Fire Support. Talk to Paladin Danse about the interceptor you plan to build and he will provide you with support after you complete the quest Call to Arms. You will be asked to provide info related to the Institution via the quest From Within.
Upon completing his request, you can speak to Proctor Ingram the faction scientist on how to build the signal interceptor.
Option 2: Minutemen
If you have finished the quest When Freedom Calls, you can enlist the help of Preston Garvey. Head to his location in Sanctuary or the Settlement you sent him to and speak with him about the interceptor. He will ask you for some help in exchange and you will then have to complete the quest The First Step. You will be asked to provide info related to the Institution via the quest Inside Job.
Upon completing his request, you can speak to Sturges the faction scientist on how to build the signal interceptor.
Option 3: The Railroad
Go to the Old North Church and speak with Desdemona about the interceptor. She will ask you to join the cause via the quest Tradecraft with the Companion Deacon before agreeing to help you. You will be asked to provide info related to the Institution via the quest Underground Undercover.
Upon completing her request, you can speak to Tinker Tom the faction scientist on how to build the signal interceptor.
Option 4: Build it Yourself
You may choose to eschew the help of the Factions and build the interceptor yourself, at any Workshop that you have found. You will clear an area in one of your Settlements and begin working.
Constructing the Stabilized Reflector Platform
Materials:
Resources:
- Power x3
Upon finishing speak with your respective faction scientist to learn more about special materials needed for the beam emitter, relay dish and console.
Constructing the Beam Emitter
Materials:
- Rubber x10
- Steel x3
- Copper x5
- Military-grade circuit board x1 (can be found at military sites: looted from turrets and other machines)
- Circuitry x1
Resources:
- Power x20
Constructing the Relay Dish
Materials:
- Copper x3
- Steel x3
- Cloth x6
- Gold x3
- Sensor Module x1 (can be found at telecom sites or tall structures such as Trinity Tower and Revere Satellite Array. Warning, the Array is guarded by super mutants. )
Resources:
- Power x5
Constructing the Console
Materials:
- Rubber x2
- Copper x3
- Steel x5
- Biometric Scanner x1 (can be found at hospitals)
Resources:
- Power x2
Once all the components are constructed, access the generators in your workshop and build the generators you need to power the interceptor.
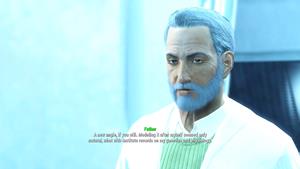
After successfully using the interceptor to teleport you arrive at the Institute. A voice will direct you on where to go, and you will meet Father who is in charge of the Institute. Speak with him and join the Institute. You may retract this agreement later; in the meantime continue the ruse and explore the location.
Go to Institute Bioscience and speak with Doctor Clayton Holdren, then locate Chief Engineer Allie Filmore in the main concourse. If you access Institute SRB and speak with the acting director Justin Ayo you will find he does not trust you. Speaking with Doctor Madison Li, will gain you a relay installed into your Pip-Boy which will allow you to fast travel to this location.
Once this quest is complete you may now continue your chosen faction quests. The Minutemen holotape may be inserted in a terminal near the teleportation arrival spot. If you are having trouble retracing your steps, simply locate the DNA themed elevator in the center of the facility go to its lowest ground level point. Activate the call button to call the elevator, and then ride it back up to the top. The terminal will be at the end in the room where you teleported in.
Once you have chosen a faction to support, you will begin the Act 3 quests.
Fallout 4 Act 3 Main Quests Walkthrough
Click to be redirected to the specific page of the quest.
The Nuclear Option (Brotherhood of Steel Method)
- Talk to Elder Maxson
- Reach Institute reactor
- Use terminal to override Institute lockdown
- (Optional) Issue evacuation order
- Reach the reactor
- Plant fusion pulse charge inside reactor
- Talk to Elder Maxson
- Talk to Proctor Ingram
- Talk to Shaun
- Step into the relay
- Activate detonator
- Talk to Elder Maxson
NOTE: This quest is only available if you have chosen allegiance to the Brotherhood of Steel. Head through the robotics area, defeating Synth enemies along the way. Drop through the hatch to enter the BioScience lab, and continue towards the reactor entrance, which at this point has had its blast door activated.
Press the button at the central elevator to enter Father's quarters. You will obtain the password to override from him, or you can hack the terminal. Do either, and activate the Master Security Lockdown Override. You may trigger an evac warning to spare lives; this is an optional choice.
Go back through Advanced Systems to enter the reactor chamber. If you haven't evacuated the facility, you will encounter synths and scientists. Access the reactor door and then activate the housing.
Proctor Ingram will teleport you to the Institute Relay Control Room. Speak to Elder Maxson, and then Ingram will mention a child nearby. Speak to him and you have 2 options:
- Agree to save him and look after him, at which point Ingram will look after him until you reunite at Boston Airport.
- Say the child must stay.
Speak into the relay and teleport to the Mass Fusion Building roof where you can press a button to complete your mission. Speak with Elder Maxson to conclude your main quest journey.
The Nuclear Option (Minutemen Method)
- Talk to Preston Garvey
- Talk to Sturges
- Gain access to The Institute
- Activate Institute Relay
- Talk to Preston Garvey
- Reach Institute reactor
- Use terminal to override Institute lockdown
- (Optional) Issue evacuation order
- Reach the reactor
- Plant fusion charge inside reactor
- Talk to Preston Garvey
- Talk to Sturges
- Talk to Shaun
- Step into the relay
- Use the detonator
- Talk to Preston Garvey
Your affiliation with the Minutemen is reaching a culmination and your next move is to go to The Institute (Location). Speak with Preston Garvey and Sturges who will tell you how to enter the Institute. The data you stole during Inside Job revealed to them the location of an Institute teleporter. Sturges gives you Institute Relay Targeting Sequence to insert into the terminal in the Institute and an Automatic Laser Musket.
Travel to the river in Cambridge, east of Greentech Genetics. It is recommended to wear a Hazmat Suit or Power Armor here to negate the radtiation of the river. Dive into the water and swim to the Public Works Maintenance area. Once there activate the keypad.
Open the gate and drop through the pipe to access the swer. Locate and follow the white piper with arrows on it through the sewer. Hack the terminal or pick the lock of the door, and head through the hole in the wall. Alternatively, head through the open security door northeast of the first door. Fight your way to the open pipe and go in to access the Institute. Open the hatch to enter.
Load the targeting sequence that Sturges gave you into the relay terminal to teleport Preston and some Minutemen in. Speak with Preston to obtain a Fusion Pulse Charge. Head through the robotics area, defeating Synth enemies along the way. Drop through the hatch to enter the BioScience lab, and continue towards the reactor entrance, which at this point has had its blast door activated.
Press the button at the central elevator to enter Father's quarters. You will obtain the password to override from him, or you can hack the terminal. Do either, and activate the Master Security Lockdown Override. Preston will ask you to trigger an evac warning to spare lives; it is your choice to comply or not.
Go back through Advanced Systems to enter the reactor chamber. If you haven't evacuated the facility, you will encounter synths and scientists. Access the reactor door and then activate the housing.
Sturges will teleport you to the Institute Relay Control Room. Speak to Preston, and then Sturges will mention a child nearby. Speak to him and you have 2 options:
- Agree to save him and look after him, at which point Sturges will look after him until you reunite at Sanctuary or other location you sent Sturges to live.
- Say the child must stay.
Speak into the relay and teleport to the Mass Fusion Building roof where you can press a button to complete your mission. Speak with Preston to conclude your main quest journey.
The Nuclear Option (The Railroad Method)
- Talk to Desdemona
- Talk to Z1-14
- Kill everyone in the relay control room
- Talk to Desdemona
- Reach the reactor
- Use terminal to override Institute lockdown
- (Optional) Issue evacuation order
- Reach the reactor
- Plant fusion pulse charge inside reactor
- Talk to Desdemona
- Talk to Tinker Tom
- Talk to Shaun
- Step into the relay
- Activate detonator
- Talk to Desdemona
NOTE: This quest is only available if you have sworn allegiance to The Railroad and have completed the Railroad quest Rockets' Red Glare. Speak to Desdemona and accept her task to infiltrate The Institute.
Relay into The Institute (Location) and link up with Z1-14. Committing to the cause at this point will cause any of The Institute Quests you've had in progress to fail so before speaking with Z1-14, make sure you've wrapped up any essential or radiant quests for them you were hoping to finish with the exception of End of the Line which will make the Railroad hostile. Once ready, eliminate the room of hostiles and Desdemona and other members of the Railroad will port in and hand you a Fusion Pulse Charge which you will be using to bring an end to the conflict for good.
Head through the robotics area, defeating Synth enemies along the way. Drop through the hatch to enter the BioScience lab, and continue towards the reactor entrance, which at this point has had its blast door activated.
Press the button at the central elevator to enter Father's quarters. You will obtain the password to override from him, or you can hack the terminal. Do either, and activate the Master Security Lockdown Override. You may trigger an evac warning to spare lives; this is an optional choice.
Go back through Advanced Systems to enter the reactor chamber. If you haven't evacuated the facility, you will encounter synths and scientists. Access the reactor door and then activate the housing.
Tinker Tom will teleport you to the Institute Relay Control Room. Speak to Desdemona, and then Tom will mention a child nearby. Speak to him and you have 2 options:
- Agree to save him and look after him, at which point Tom will look after him until you reunite at the Railroad base.
- Say the child must stay.
Step into the relay and teleport to the Mass Fusion Building roof where you will press activate a detonator to complete your mission and rid the Commonwealth of the Institute. Speak with Desdemona to conclude your main quest journey.
 Anonymous

curie and the science and institutes of learning
0
+12
-1